Update: This feature has since been removed from the final release of Windows Vista Service Pack 1. It was only available during the beta period and you will not be able to utilize the feature today. If however you’re feeling a little adventurous, you can use a little hack to add in this feature.
 One of the new administrative tools Windows Vista Service Pack 1 provides is the ability to create a recovery disc. At first, the name might fool you into thinking the type of discs system manufacturers provide to you when you purchase a new computer to restore your computer to a factory state, but this is not that. A more appropriate name would be “Windows repair disc”.
To be blunt, this tool creates merely a slimmed-down Windows installation disc. It takes a normal Windows installation disc image and strips out all the “installation” functionality leaving only the repair tools and common system files.
What a lot of people don’t know (or need to know) is that their Windows Vista DVDs are in fact running Windows PE, an extremely lightweight version of Windows that can be booted from removable media for the purpose of system maintenance. Up until now, creating a Windows PE image was not an easy task. This tool basically simplifies it down to just two clicks.
You can find the tool in the “Start menu” > “All programs” > “Maintenance” > “Create a Recovery Disc”. You will need either a blank CD or DVD along with your original Windows installation disc. It will take approximately 5 minutes to complete.
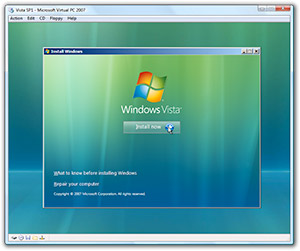
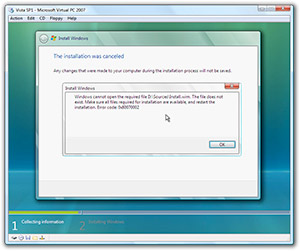
If you boot this CD/DVD, it will look identical to your Windows installation disc. You will be asked to choose a language and even present you the “Install now” button. If you do decide to go on, you won’t get very far before an error stops you.
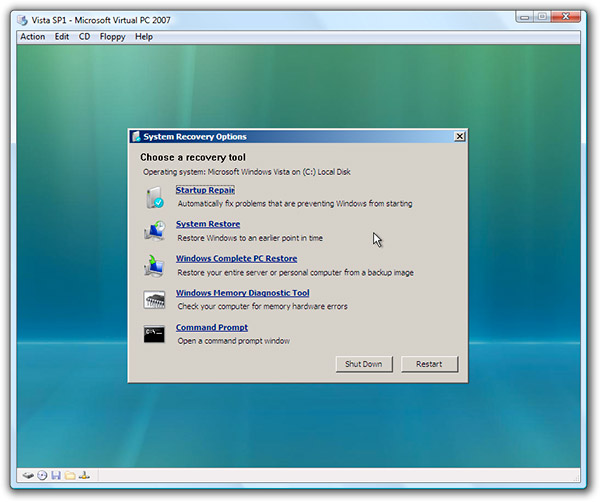
To enter the Windows Recovery Environment, click the “Repair your computer” link at the bottom of the welcome screen and select the Windows partition you wish to repair. After this, it will present you with a list of options including startup repair, system restore and command prompt. This is identical to the repair screen you would see in your installation disk. From here, you can even do a literally last-minute backup by sticking in a USB flash drive and copy documents across. Because it runs Windows, most USB drivers are available and it’ll work out of the box.
Because this is not an actual Windows install disk, it only takes up a few hundred MBs to fit on a CD, and you are free to make as many copies as you like and even share it with others. It’ll be even better if you can create a bootable USB version.
 First off, I want to congratulate

 Even if the